Tables (1)
Table is a matrix like structure which holds objects such
as text, images, buttons and etc in its cells. In most professional web pages
they are used in web pages to place adjust text and image positions even though
you do not see table borders. Later you will see how it is possible to set the border
size of tables to 0 to hide them.
Drawing a table
To draw a table we use
<TABLE> tag. <TABLE> tag needs to related tags for its rows and
columns.
<TR></TR> tag is
used to create a row in table. Each <TR></TR> tag nested in
<TABLE> </TABLE> tag will create a new row in the table. In
addition one or more <TD></TD> tags are used to create columns in
each row. Following example produces a table with two rows.
<TABLE>
<TR>
<TD>First Row</TD>
</TR>
<TR>
<TD>Second Row</TD>
</TR>
</TABLE>
If you browse this code in a
browser, you will not see any table but two lines of text. In fact table is
there but you cannot see it.
<TABLE> tag will by
default create a table with border size of 0. You must use a “border” parameter
to specify a border size for your table.
<TABLE BORDER=1>
<TR>
<TD>First Row</TD>
</TR>
<TR>
<TD>Second Row</TD>
</TR>
</TABLE>
Specifying table sizes
You can specify width for a
table both in percents of page width and in pixels. This means if user resizes
browser window, browser will maintain a width of 50% of its window for the
table.
Example 5-1: page5-1.html
<HTML>
<HEAD>
<TITLE>Example 5-1</TITLE>
</HEAD>
<BODY>
<TABLE WIDTH=50% BORDER=1>
<TR>
<TD>Cell Row1 Col1</TD>
<TD>Cell Row1 Col2</TD>
</TR>
<TR>
<TD>Cell Row2 Col1</TD>
<TD>Cell Row2 Col2</TD>
</TR>
</TABLE>
</BODY>
</HTML>
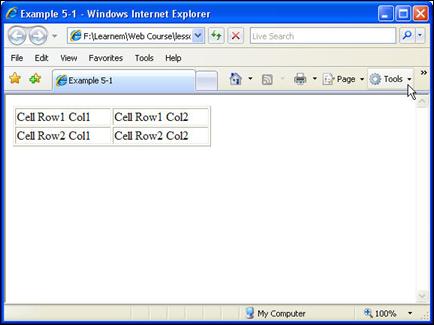
Figure
5-1: a 2*2
table
If you want you can determine
table width in pixels. In this way width of the table will be fixed and
resizing the browser window will not have any effect on the table size.
<TABLE WIDTH=250 BORDER=1>
<TR>
<TD>Cell Row1 Col1</TD>
<TD>Cell Row1 Col2</TD>
</TR>
<TR>
<TD>Cell Row2 Col1</TD>
<TD>Cell Row2 Col2</TD>
</TR>
</TABLE>
You can specify a height for
your table too. Width and height of the table will be divided between cells in
rows and columns so if table width is 100 pixels and there are 2 columns then
width of each cell will be 50 pixels. Just pay attention that if you put a long
text in a cell which is longer than the cell itself, cell will be expanded to
fit the text in it.
Text alignment in table cells
By default text entered in a
cell will appear at the left side of the cell. You can add either of below
options to <TD> tag to specify horizontal alignment of text inside the
cell.
<TD ALIGN=CENTER>
or
<TD ALIGN=RIGHT>
or
<TD ALIGN=LEFT> (this option is the
default if you do not specify)
You can also determine
vertical alignment of text in a cell by adding VALIGN option to <TD> tag.
There are three values for
VALIGN option : TOP, BOTTOM and MIDDLE. MIDDLE is default value if you do not
use this parameter.
Example 5-2: page5-2.html
<HTML>
<HEAD>
<TITLE>Example 5-2</TITLE>
</HEAD>
<BODY>
<TABLE WIDTH=50% HEIGHT=100
BORDER=3>
<TR>
<TD ALIGN=LEFT VALIGN=TOP>TOP LEFT</TD>
<TD ALIGN=RIGHT VALIGN=TOP>TOP RIGHT</TD>
</TR>
<TR>
<TD ALIGN=LEFT VALIGN=BOTTOM>BOTTOM LEFT</TD>
<TD ALIGN=RIGHT VALIGN=BOTTOM>BOTTOM RIGHT</TD>
</TR>
</TABLE>
</BODY>
</HTML>
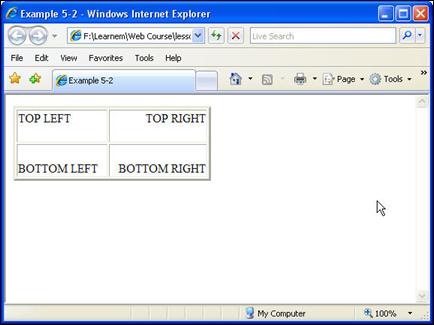
Figure
5-1: a 2*2
table, with alignments
Images in table cells
As we mentioned earlier,
tables are also used to hold images in their places. You can insert an image in
a table cell by enclosing <IMG> tag between <TD></TD> tags of
a certain cell.
Example 5-3: page5-3.html
<HTML>
<HEAD>
<TITLE>Example 5-3</TITLE>
</HEAD>
<BODY>
<TABLE BORDER=4>
<TR>
<TD><IMG SRC="logo.gif"></TD>
</TR>
</TABLE>
</BODY>
</HTML>
Figure
5-1: Image
inside a table with a border size of 4
Exercises
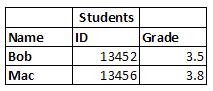
1. Create a 3*3 table similar to the following picture. Use same alignments and make titles of table, rows and columns as bold.
2. Create a 2*2 table. Insert an image file (small sized) in each cell of table. Adjust cell alignment of each cell so that images gather at the center of the table sticking to each other. Adjust table width to 50% of web page width. Set the height of the table to 200.
Next Lesson
|